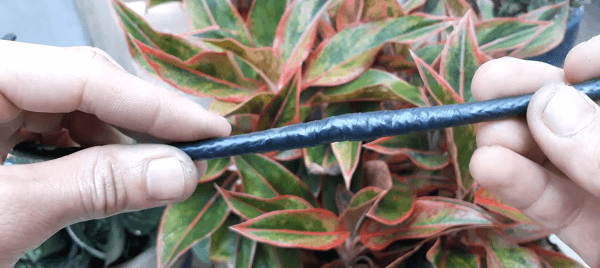
Table of Contents
Although it may sound complicated, splicing a coaxial cable is straightforward. You can repair a tear in your coax cable with minimal tools and continue with business as usual. Here is an easy guide to repairing your coax cable with and without a connector.
What Is a Coax Cable?
A coaxial (coax) cable has an inner conductor encased in an insulating layer, which is then encased in a conductive shielding. In addition, many coax cables also have an insulating outer layer. All of these layers protect the central conductor.
You can find coax cables within homes, connected to cable televisions for the most part. However, coax cables can also be used for telephone lines and internet routers. They are a reliable technology that gives accurate electrical transmissions, but they aren’t without their faults.
The main advantage of coax cables is their shielded design, which keeps them from suffering environmental damage or interference.
Cable Splicing
If you’re unfamiliar, cable splicing is meant to fix damaged cables instead of purchasing new ones. You can extend a cable if it can’t reach the source you need to plug into. Splicing the wires ensures the cable can efficiently carry a current from one end to the other.
Splicing involves connecting the endpoints of two or more electrical conductors in a cable. You don’t change the properties of the cable, but you should be connecting cables of the same or similar properties, which keeps your cable running at top performance and prevents any connection issues.
Before you Begin
With all the tools available at your local hardware store, splicing coax cables is straightforward. Although you won’t have to hire a professional to do the task, you shouldn’t start working on this project without some basic electrical knowledge in your pocket. So ask yourself these questions before you get started.
- What kind of coax cable are you using? (RG6 and RG59 cables are the most common ones used in homes)
- Will you be using connectors?
- Do you want to lengthen or shorten the coax cable?
If you are unsure how to identify the coaxial cable you’re using, they’re easy to check. Usually, cables are marked with their cable type, and you can find them printed on the cable sleeve. You can also tell what coax cable you’re working with based on what it’s being used for.
You don’t need to use a connector for any reason, but they’re much more efficient than stripping a cable yourself. Consider using a connector when you splice a coax cable since it will maintain the shielding of the cable.
Whether you lengthen or shorten your coax cable, you need the appropriate materials to splice it correctly. Try to use the same kind of cable as the one you already have if you want to lengthen the coax cable, ensuring your cable continues to work correctly and won’t have connection issues.
Above everything else, turn off any electrical equipment these cables are connected to before you start! Turned off, disconnected, and in a safe environment.
Splicing a Coax Cable
Follow these steps to safely and effectively splice a coax cable with a coax stripper.
Specific Tools You Need
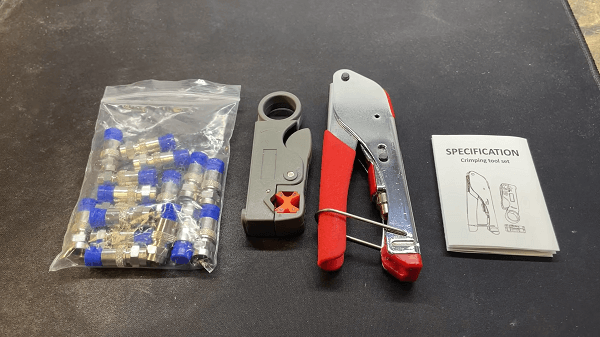
Learning how to splice coax cable without tools can be tricky. To create a coaxial cable splicing kit, you will need the following tools:
- Coaxial cable stripper
- Coaxial compression connectors (only if you plan on using a connector)
- Coaxial compression tool (you only need this if you plan on using a connector)
- Additional coax cable (if you plan on lengthening your existing coax cable)
- Barrel connector or splice adapter
- A knife and a soldering iron (if you don’t plan on using a connector)
You can get any of these materials at a hardware store. You shouldn’t use a knife to strip a coax cable unless you have experience and a steady hand. Just be sure you have the proper safety equipment before you start splicing a cable.
1. Strip Your Cable Using the Coax Stripper
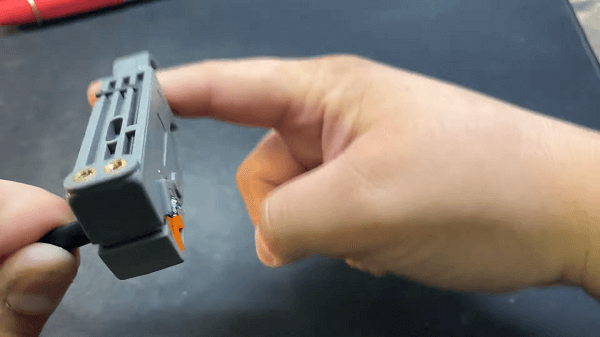
Your average cable stripper can strip all kinds of cables, but you need a stripper that is compatible with your coaxial cable. In addition, you want to ensure the stripper will remove the insulation without removing or fraying the copper wire inside.
Insert one of the terminated ends into the stripper. The end you insert should match the guide marked on the stripper tool, ensuring that you are splicing equal ends of the cable. After you strip the cable, you see the insulation of your coax cable and the wire mesh that covers it.
A bit of the inner copper wire should be poking out of the tip. Next, you must fold the wire mesh back into the outer casing. Make sure you don’t leave any stray wires poking out, which will interfere with your cable’s signal quality.
2. Put the Coaxial Compression Connectors on the Coax Cable
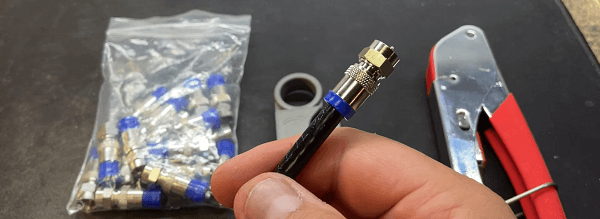
Affix your coax compression connector to the insulated portion of your coax cable. Take care that you don’t damage the copper wire in the process. It should still be poking out of the connector once on the cable. If the copper wire is damaged in the process, you will need to trim it down and strip it again.
Repeat the same process for the other end of your coax cable.
3. Carefully Use the Coaxial Compression Tool
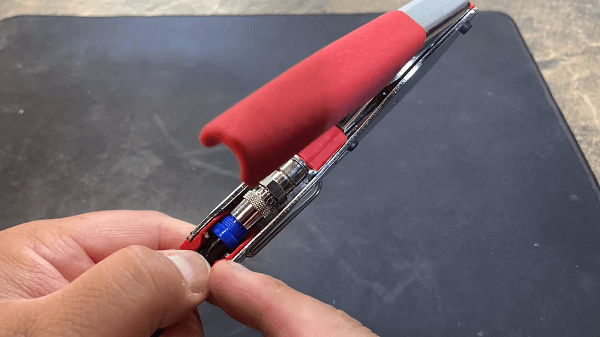
A coax compression tool is suitable for any kind of coaxial cable. Insert the coax cable (with the compression connector attached) into the compression tool. Forcefully press the compression tool until it crimps to the wire.
Repeat the same process for the other end of your coax cable.
4. Use the Barrel Connector
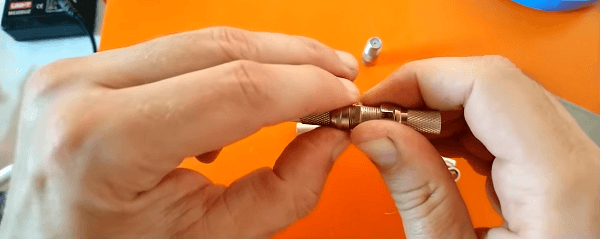
This last step is crucial if you want to extend the length of your coaxial cable. Insert one end of each cable into the barrel connector. The copper wire poking out should go into the female connection ports on either side of the barrel connector. Tighten the cable connector onto the barrel connector until it is secure and you’re done splicing!
Splicing Without a Connector
Whether you don’t want to use a connector or don’t need to, it’s just as easy to splice a coax cable without a connector. You can also splice a coax cable without the commercial tools listed above. You can use these instead:
Tools
- Sharp blade of some kind
- Electrical tape or heat shrink
- Pliers
- Soldering iron (optional)
- Soldering wire (optional)
1. Strip Your Coax Cable
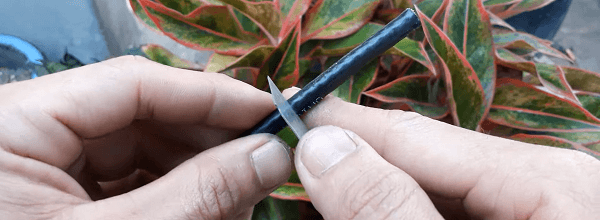
Use a coax stripper or a blade in the same fashion as listed above. If you aren’t using a cable stripper, carefully strip off a couple of inches of the rubber shield with your knife. Fold the wire mesh as far back as possible from the insulator as possible. Don’t strip close to the copper wire. We’ll be getting to that soon.
2. Cut Back Some of the Insulator Tips
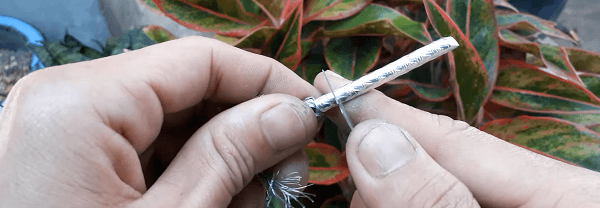
If you use a coax stripper, you won’t have to worry about this part. However, if you use a knife to strip the coax cable, you will need to strip off some of the insulator tips from the copper wire.
3. Connecting the Copper Wires
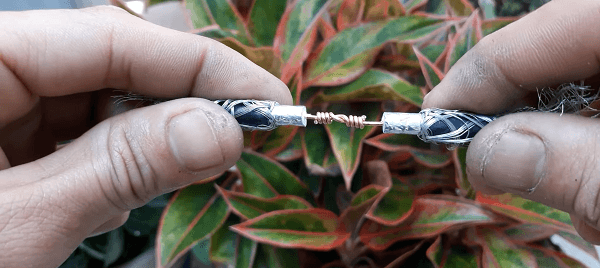
Cross the wires at the halfway point. Twist one side and then the other. Use pliers to make sure it’s tight. When you have done that, use a heat shrink or electrical tape. Cover the wire from one side to the other. Your wire mesh should still be pulled back at this point.
(Optional: You can solder the wires for a better connection. Get your soldering flux, and soldering iron. and just go around the twisted wires and fill the gaps.)
4. Pull the Wire Mesh Back
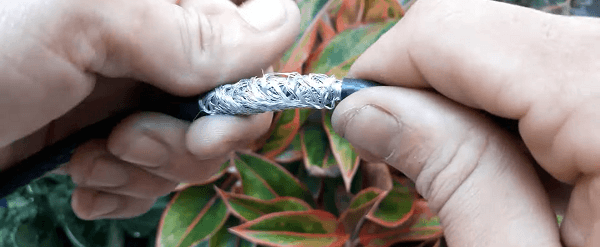
Once the copper wires are properly soldered and insulated, pull the wire mesh back towards the tip of the cable. Twist the so the mesh is tight. Then use electrical tape or a heat shrink to isolate it.
(Optional: You can solder the mesh. Just go around and fill the mesh with soldering flux. It will hold better.)
How to Tell If Your Coax Cable is Bad
You need a solid connection with your coax cable if your TV and internet are going to work. Everyday use on your coax cables creates issues with your wiring, which leads to weak internet connections. If you suspect your coax is experiencing problems, you can test it to see whether the issue lies in your cable modem, the coax wires, or your ISP.
Most often, coaxial cables will go bad because they suffer physical damage. So even though they may look like heavy-duty cables, you should treat these cables with care. Chew marks and tears are a sign that the insulating layers are compromised.
Coax cables aren’t waterproof and can melt easily if you leave them in the sun. If the inner wire gets bent or broken, you must test its connection. That sort of damage is hard to see.
Repairing versus Replacing
When learning how to splice a coax cable, you’ll need to identify if it needs repairing or replacing.
Like anything in this world, coaxial cables will inevitably get so damaged that you need to replace them. Repairing a coax cable is easy and hassle-free, but you should also know when to replace your cable. If, despite your best efforts, you need to replace your coax cable, look out for these things.
Keep an eye out for your coax cable being left in a hot environment for long periods. The cable can melt down on itself, which makes connection virtually impossible. It should also go without saying that you shouldn’t use a coax cable near water or underwater.
A water-clogged cable can change the center conductor’s electrical properties and leave the cable unusable.
Generally, you should replace your coax cable if your internet connection continues to be spotty or get worse. Even after you repair the cable, this is a sure sign that the cable has gone bad.
If your coax cable is attached to your television, this can translate to your TV not getting a signal. If your TV isn’t displaying any of your channels, this is also a sign that your coax cable needs replacing.
Splicing a Coax Cable
If you are splicing coax cables, it is best to follow these steps to do it safely and effectively. Get together the tools you need for your coaxial cable splicing kit to have on hand any time you need to splice a coax cable at home.

