Table of Contents
Your battery cable ripped or snapped, and you don’t have a crimping tool. Crimping tools can be expensive and come with many potential discrepancies. Investing in a specialized tool such as a crimper is not worth it if you are only crimping a few cables.
In this article, you will be able to learn step by step how to crimp a battery cable without a crimper.
How To Crimp Battery Cable Lugs Without A Crimper
Sometimes you may need to perform a task without all the tools for the job, such as crimping wire cables. For example, if you are only replacing a few crimped battery terminals, there is no reason to buy a new crimping tool.
Several alternate methods exist to crimp battery cable lugs without a crimping tool. These methods are simple, just as effective, and can save money.
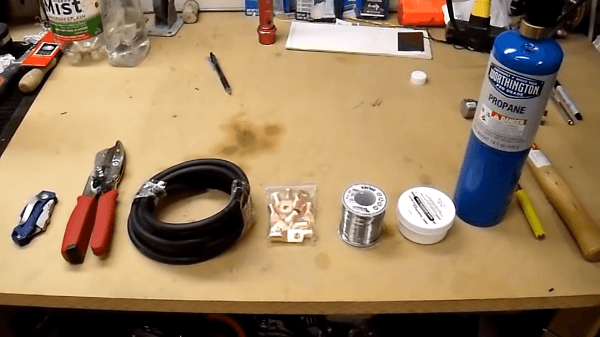
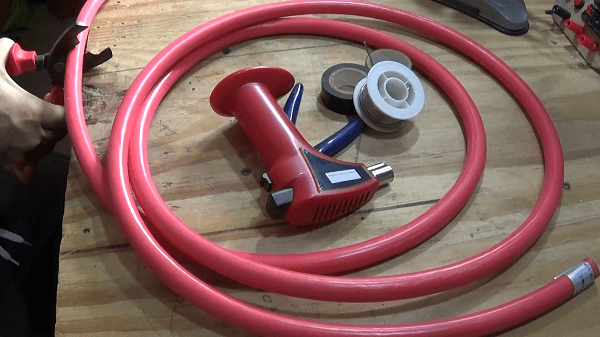
Here are some tools and supplies you will need:
- Wire or cable cutters: Cable cutters are strong and easily cut through thick copper wiring.
- A razor knife: This tool strips the insulation off the cable.
- A clamp: Use this to hold the cable. A bench vice is helpful if you’re planning to solder your terminal lug.
- A heat gun: Used for attaching the cable sheath.
- Heat shrinking cable sheath: Use this to cover any exposed wiring. These sheaths shrink fast and strengthen the connection of your terminal lug while protecting it from rust and corrosion.
A few supplies and tools that are not required but will make the process easier. These include:
- Butane torch: Used for soldering the terminal and boiling the flux.
- Soldering wire: Used to secure the terminal to the cable.
- Soldering flux: This non-acidic rosin fluid is a good choice for soldering your cables and will help them last longer because the connection will not corrode.
Now that you’ve gathered your tools, follow these steps to crimp your battery cable.
1. Cable Prep
Measure out and mark the desired cable length to cut with your wire cutters, and then cut it. The cable must have an even cut. (Avoid using saws or similar cutting tools, creating jagged cuts that won’t make a good crimp.)
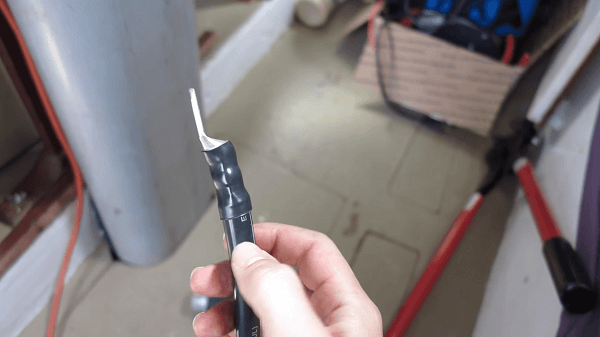
2. Stripping the Cable
Align the terminal lugs with the ends of your freshly cut cable to get accurate measurements of the amount of insulation to strip. You don’t need to worry if you strip just a bit too much insulation from the cable, which is fixable later.
A trick to strip the insulation is to take your cable cutters, lightly press them along the insulation, and then rotate them along the cable to make a perfect indicated circle. Then take your razor knife, cut along the indented circle, and strip the insulation.
Be patient and take your time so that the copper wiring underneath does not get sliced.
If the copper wiring flays out, twist the writing until it is tightly wound together with no strands jutting out.
3. (Optional:) Rosin Fluid
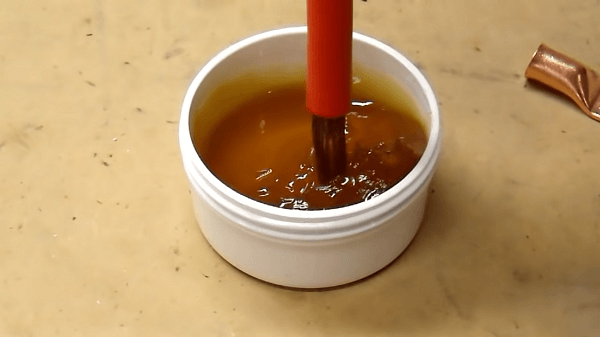
Now that your wiring has been stripped, graciously dip the tip of the wiring into non-acidic rosin fluid. Non-acidic fluid is better because the point of soldering your terminal lug is to make it last longer. Normal rosin fluid will corrode the copper wiring inside the terminal over time, weakening the electric current.
4. Attach the Terminal Lug
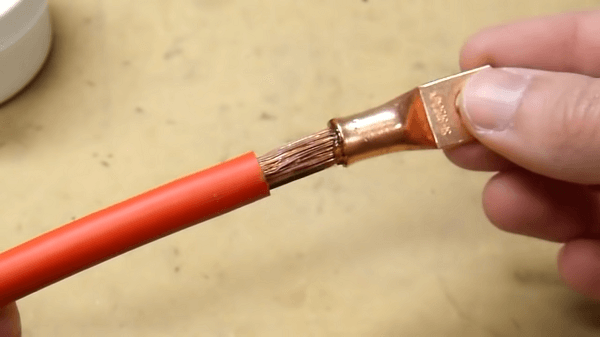
The lug should be able to slide over the exposed wiring with a snug fit. There will likely be a small gap between the terminal and the insulation.
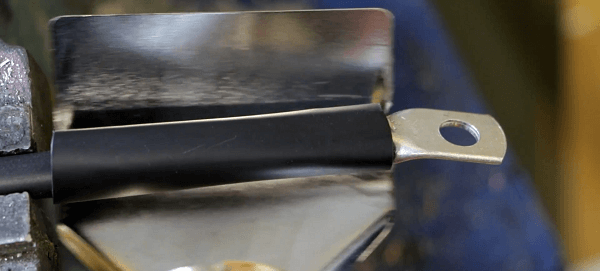
5. Clamp the Terminal Lug and Prepare to Crimp
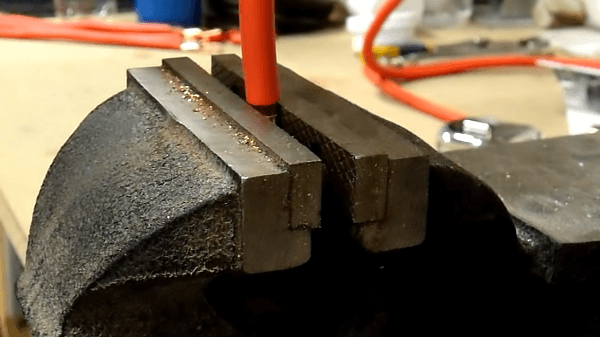
Once the terminal lug is snuggly attached to the wiring, clamp the cable tightly so you can crimp the terminal evenly. If you want to clamp and crimp the cable simultaneously, you can use a bench vice to crimp the lug.
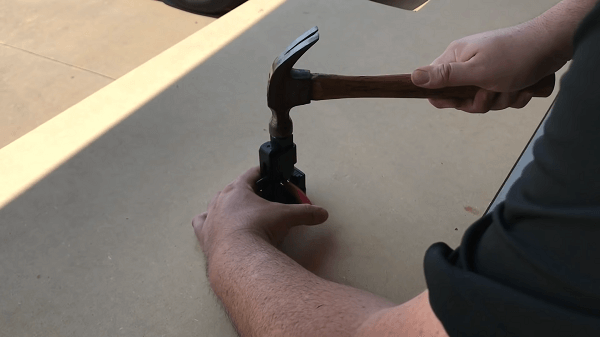
Alternatively, you can use a chisel and hammer to crimp the lug. More than one crimp will be required with this method.
6. (Optional:) Solder the Lug to the Wiring
If you want to ensure a stronger connection, then you can solder the terminal to the wiring. Keep the cable clamped so you can safely solder the terminal and boil down the rosin fluid, ensuring the tightest fit and a longer-lasting cable connection.
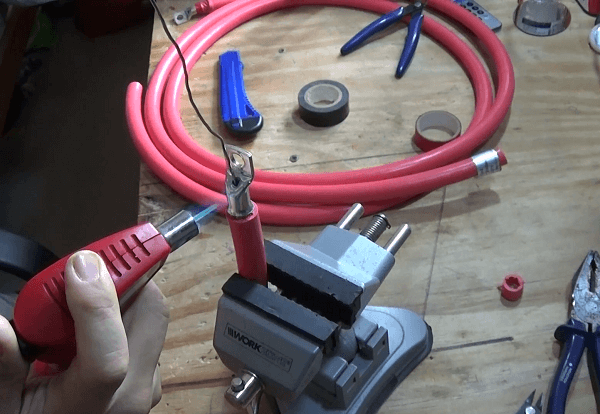
7. Cover the Cable With Sheathing
With the battery cable securely crimped, the final step is to cover the terminal and connect the cable with a heat-shrinking sheath. Slide the sheath on and then heat evenly with a heat gun or butane torch until the sheath fits tightly.
How To Tighten Cable Wire (With A Crimper)
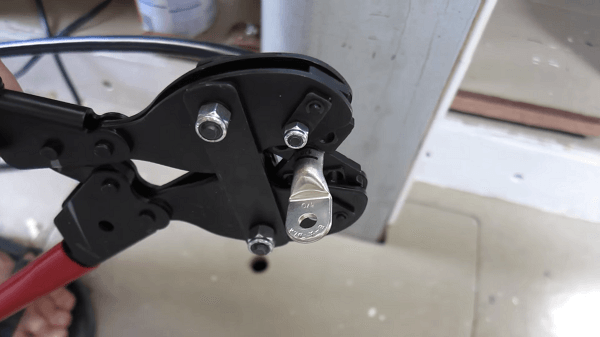
If you own a crimping tool, the method to crimp battery cable lugs is identical. There are several types of crimping tools for electric terminal fitting:
- Handheld: Handheld crimping tools are small and portable. They require manual operation and are intended for small-scale work.
- Electrical: Similar to handhelds, they’re small and portable. However, these are battery-powered, and the crimping process is automated.
- Benchtop: As the name suggests, these crimping tools are mounted onto a workbench for larger work. They’re powered by electric motors so they can create powerful crimps.
- Pneumatic: These crimping tools are powered by powerful compressed air. They come in manual and benchtop models, but they require a lot of power either way.
- Hydraulic: Hydraulic crimping tools are the strongest. They’re intended for large-scale, industrial work and specialize in extreme power and speed.
Once you have picked a type of crimping tool, you can follow these steps to tighten the cable wire.
1. Strip the Cable

Carefully cut and strip the insulation off the cable to match the length of the terminal fitting. Remember to go slow to avoid cutting the wiring underneath. Then twist the wiring so that it’s tightly clumped together.
2. Attach the Terminal

Slide the terminal lug onto the exposed wire until it is snug. It’s good to ensure that the coppering wiring is tightly wound together before inserting it into the terminal, resulting in a better crimp.
3. Crimp the Terminal
There are several types of crimping tools. First, fit the terminal with the properly sized nest. Some tools are designed with color-coded nests.
Then, squeeze tightly to create a long-lasting seal. Ratchet crimping tools automatically release when the terminal is crimped, so you won’t have to squeeze excessively.
How To Replace Crimp Battery Terminals
Corroded circuitry in old vehicles or machinery is common. One step in repairing old cables is to replace the terminal lugs. Here is a step-by-step method on how to replace crimp battery terminals.
- 1. Cut the Old Terminals: Even a terminal lug in disrepair cannot be removed from the cable. Instead, you’ll have to cut the cable to remove the old terminal.
- 2. Strip Back More Insulation: No matter the method, you’ll always have to strip the ends of your cable to attach the terminals. Remember to measure the length of the terminal lug to assess how much cable you need to strip.
- 3. Attach the New Terminal and Crimp: After your cable is stripped, you can attach your new terminals and crimp them for renewed battery connection. If you want to ensure that your terminal will last, you can solder it on.
Frequently Asked Questions
The following are the most commonly asked questions regarding how to crimp battery cable without a crimper.
What can I use if I don’t have a crimping tool?
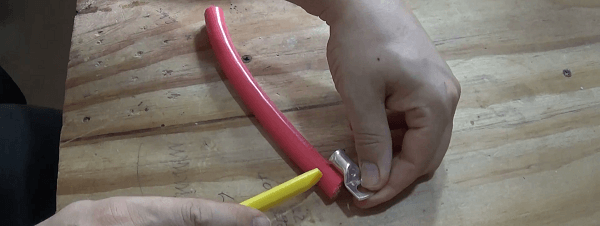
A bench vice can squeeze the terminal lug firmly onto the exposed wiring. To get more precise pressure, you can wedge a steel ball where you want the crimp to be applied on the terminal.
A hammer in combination with one of several other tools, for example, a chisel, a flat nail puncher, or angle iron. Any tool that allows you to apply even, heavy, and precise pressure will work.
Can I crimp wire with pliers?
Yes, you can use pliers if you’re in a pinch. However, pliers will not create a good crimp, so they’re not recommended. Pliers don’t cover much surface area, so the crimps won’t last. Another issue is that the crimp could create a high-resistance connection which is a fire hazard.
Can you use needle nose pliers to crimp?
Yes, they’ll work great for small-scale crimping, such as crimp pins. Needle nose wires are great tools for small and precise crimping. They’re also cheaper than crimping tools. Needle nose pliers are far more useful for crimping applications like jewelry-crafting rather than electrical work.
What is the difference between swaging and crimping?
Swaging requires specific machinery. Swaging machines are required for this method of metal forming. There are no simple alternatives to swaging, and the process involves multiple, rapid hits from rotating hammers and forming dies.
The metals get compressed with such force that they fuse. This process maintains the cylindrical shapes of the metals. Swaging produces metals that can withstand heavy weight and tension.
Crimping joins metals together with a single compressive force, typically with a handheld tool. This force deforms the surface area of the metal into a divot leaving the terminal no longer cylindrical.
Crimping fuses and organizes the wires into fittings so they can be easily attached to other electrical components. While crimped wires hold firm, they are not intended to support heavy weight.
Crimping A Battery Cable Without A Crimper
You’ll likely have to crimp a wire at some point if you own a vehicle or do work on your home. Crimping tools can provide a reliable, quality crimp if you regularly perform electrical work.
However, if you need a quick fix, there is no need to go out and buy a crimping tool. If you are learning how to crimp battery cable without a crimper, you can easily crimp a cable terminal just as well with the various methods listed in this article, saving yourself time and money.