Table of Contents
Sometimes, replacing a broken HDMI cable isn’t the best move. If you have a long run, perhaps one that’s hidden behind a wall, it can be a huge and expensive job to replace it.
Repairing a damaged cable saves you quite a bit of money, and it isn’t that hard. Let’s look at how to do it.
The Six Steps to Repairing HDMI Cable
The process for how to repair HDMI cables varies a bit depending on where the cable sustained damage. If it’s cut in the middle, you’ll need to splice the two ends together with a couple of new connectors. If the connector at the end has broken, you just have to replace it.
Step One: Gather Your Tools and Supplies
To do this job right, you’ll need some tools and a new HDMI connector.
Typical tools you’ll need include:
- A sharp razor or utility knife (to remove the outer sheath)
- Wire cutters
- Wire stripper
- Coax Stripper (for the braided insulation)
- Soldering gun and solder (optional)
- A set of small precision screwdrivers (optional)
- Continuity tester
- New HDMI connectors (one or more)
- Electrical tape or shrink wrap
Step Two: Prepare the HDMI Cable
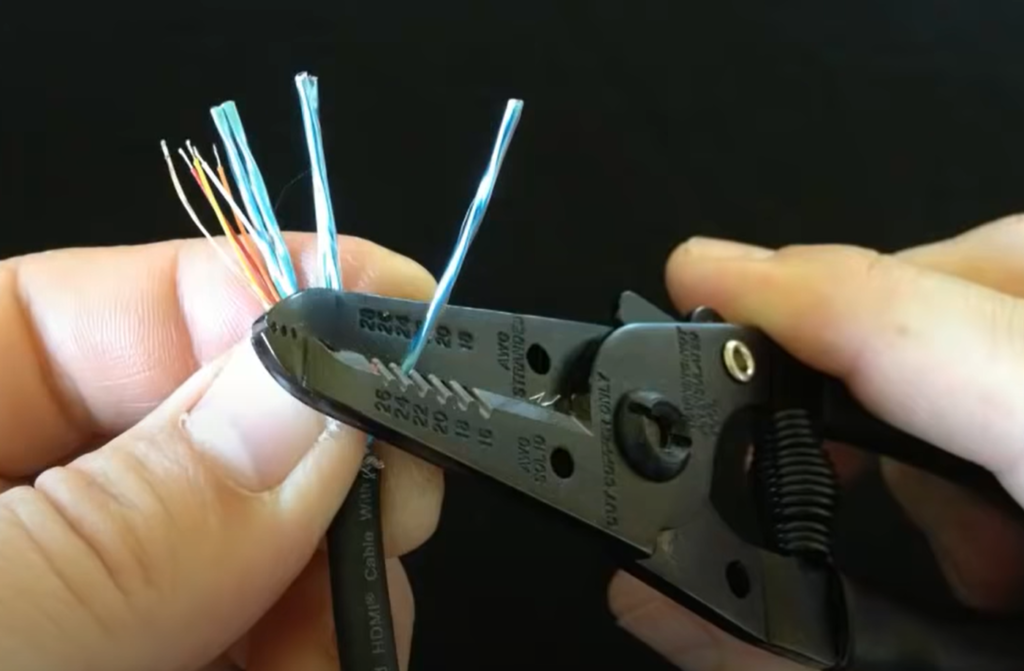
Inside the cable itself, there are lots of wires. Before you can access them, you’ll have to strip away the wire insulation a bit. To do so, use a sharp razor or utility knife to make a careful cut through only the outermost layer of the cable.
This outer layer is made of plastic and acts as a protective sheath. Your cut should only penetrate it and not the inner bundles of wire. You should remove about an inch and a half of the outer layer, exposing the inside.
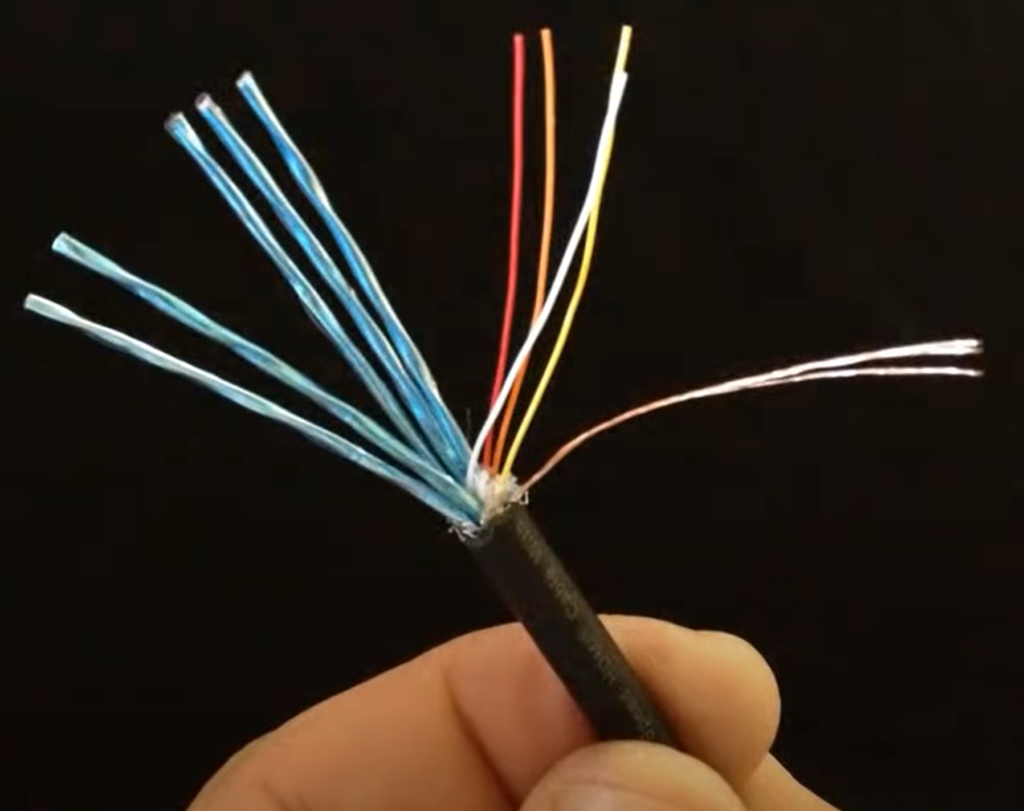
If you see aluminum foil or braided coverings that surround the wires, you’ll have to remove that as well. There is a lot of variation between manufacturers, so just take your time. You should end up with a bundle of four small colored wires, a copper ground wire, and four sets of shielded wires.
Step Three: Identify the Wires
If you buy an HDMI kit, it might come with a guide that makes this part easy. Your new connector has a screw holding its two halves together. Remove that screw, and you’ll see the terminal block inside the connector. It’s usually green and has a bunch of small terminals where (you guessed it) you’ll install the tiny wires you exposed in step two.
Unfortunately, without a wiring guide or with one that doesn’t match your broken cable, this part of the HDMI repair process is a bit tedious. You have to use the undamaged end of your HDMI cable to identify the right placement for each of the wires from your bundle. Plug your new connector into the HDMI port with the terminal block exposed.
Using a continuity tester, press one probe to a terminal and the other probe to your first wire. Keep going until the continuity tester indicates a connection. Note which wire worked on that terminal. Repeat the process until you know where each wire belongs on each terminal of your new connector, taking notes as you go.
Step Four: Attach the Wires

Most HDMI cables have soldered connections. To make repairs more manageable, you can buy repair kits with a connector that doesn’t require soldering.
Either way, the process is the same. If you plan to use shrink wrap to support and protect your wiring, put it loosely around the cable now. Otherwise, it won’t fit over the connector when wired together.
Using the reference list that came with the connector or the schematic you made in step three, carefully connect each wire to the proper terminal. Make sure to make perfect contact between the wire and the terminal without letting the insulation interfere. Also, ensure that there isn’t excessive wire exposed after insertion into the terminal.
Soldering uses heat to liquefy metal, making a sort of glue that permanently attaches the wires to the terminal. Repair kits that don’t require solder have little screws that you tighten down to complete each connection.
Take your time, and be careful to make the right connections. Even if you followed a guide and you think everything is right, consider testing your connections again. If you can, you could even plug in the new connector to make sure it works. Just be careful not to tug on your wires before everything is sealed up and secured.
Step Five: Protect Your Work
If you prepared your wire with a strip of shrink wrap, you’re ready to slide it up over the connections you just made. Use a heat gun to apply the right amount of heat, and seal your connections.
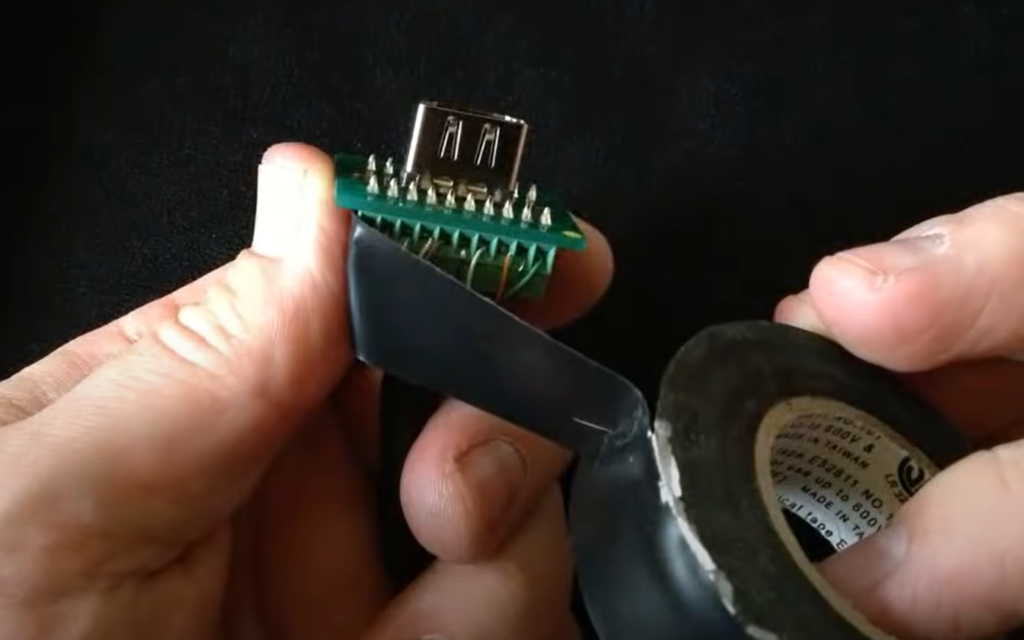
If you’re using electrical tape, tear off a small strip from your roll and carefully wrap your connections.
Two tips:
- If you forgot to pre-install your shrink wrap, don’t redo all your wires. Just use electrical tape.
- Don’t apply the electrical tape from the roll directly. Tear it off first and then apply it. Otherwise, the force you use to cut or tear the tape could damage your work.
Step Six: Enjoy!
Plug your new connector into the appropriate port on your device and enjoy your handiwork.
Now You Know How To Repair a HDMI Cable
Don’t waste time. If you need to repair an HDMI Cable, now you know what to do. And if its a USB you need to fix, here’s a how to repair a USB cable.