Table of Contents
There are few things more frustrating than plugging in an almost-dead phone to a broken charger. It is even worse if you need to use your phone and have no way to quickly buy a new one.
Once your phone dies, you will be stuck without a phone until you have access to and means to buy a new charger cord. Luckily for you, there are some simple steps you can take to fix a broken Android charger cord safely and effectively at home.
How Do Android Chargers Work?

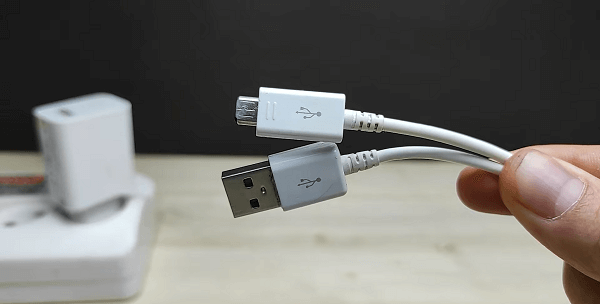
Your Android charger plugs into a Micro-USB port in your phone to charge your phone through an outlet. Electrical power pulses through your Android charger and into your phone to charge its battery. Depending on the type of phone you have, it could take from one to three hours to fully charge your Android phone.
Learning how to fix your Android phone charger cord on your own can help you save money. If you take your charger into a phone repair store for a professional to fix can cost you $20 or more. Taking your phone to a repair shop can also be time-consuming and take up hours of your busy day.
Skip the long lines and frustrations of dealing with customer service by learning how to fix your Android charger cord yourself at home.
Dangers Of A Broken Charger
A broken charger is not only ineffective, but it can also be a safely hazard. While many individuals may use a faulty charger that intermittently works, it is not advisable. Because frayed or broken electrical wires will interrupt the active current moving through the cable, your device is at risk for power surges.
Some dangers that can arise from a broken Android charger cord include:
- Phone battery damage
- Phone damage to the electrical components
- Overheating
- Fire
- Susceptible to power surges
- Electrocution
- Electrical burns
- Property damage
- Physical harm to you or others in the home
Not only are broken chargers harmful for your electrical device, they also pose safety risks for you and everyone in the home. It is much easier to fix your Android charger cord when you notice issues than wait until it creates a big problem.
Types of Damage to An Android Charger Cord and the Solution
There are many reasons an Android charger may not work correctly, so we will go over various troubleshooting steps and how to resolve them. This way, you’ll never have to deal with a dysfunctional charger again!
Let’s take a closer look at what could be wrong with your charger. You can narrow down the types of damage to your Android charger cord by determining the problem.
Ask yourself the following questions:
- Is it not charging your phone even when it’s plugged into the wall?
- Have you checked to make sure it isn’t an issue with the outlet?
- Is your phone charging but charging much slower than usual?
- Is the charger itself working but cords are exposed?
- Does your phone only charge when you wiggle or move the cord?
Now that you have the answer to these questions, we can go into further detail about the types of common damage that Android chargers face and how to fix them easily at home.
How To Fix a Broken Android Charger Cord
Tools and Materials
- Wire cutters, scissors
- Wire stripper
- Solder iron kit
- Electrical tape
- Pliers
- Scalpel
- Soldering wire
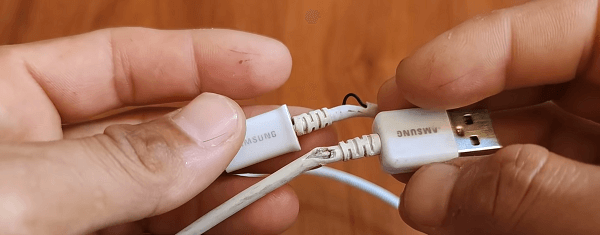
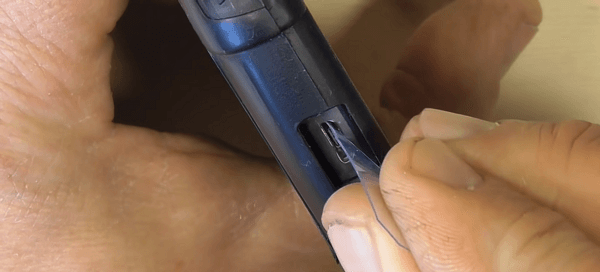
If your issue is connecting your phone to the Android charger cord in the first place, your problem could be damage to the wires near the connection plug. If you’re dealing with frayed or fractured wires, you can easily rectify this and get it working again.
1. Cutting the cable
First, cut the wire at the damage point.
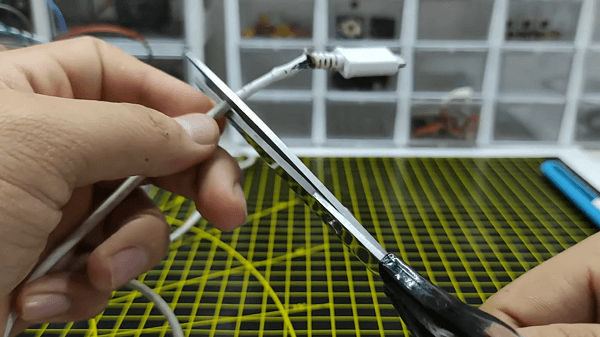
2. Stripping the cable

Remove approximately 2mm of the outer sheath protecting the wires on both ends with a wire stripper. If there is extra isolation in the cable, cut it.
3. Removing the rubber
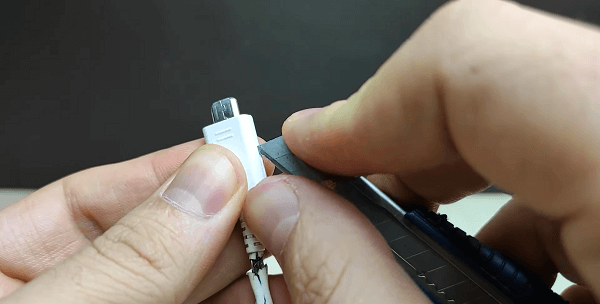
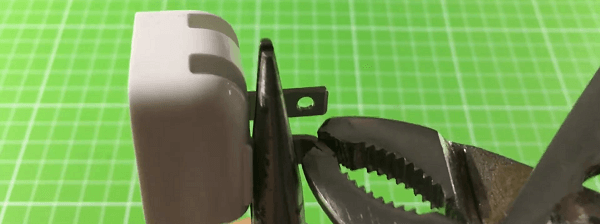
Take the end with the connector, and carefully cut the rubber around it. You want to preserve the rubber as best as you can, so you can reuse it.
4. Disconnecting the connector
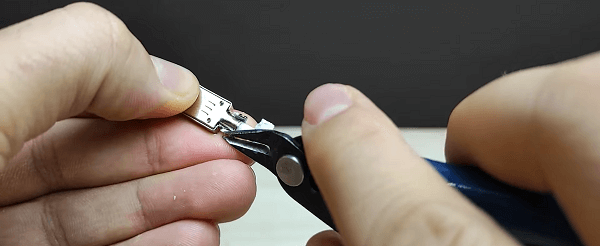
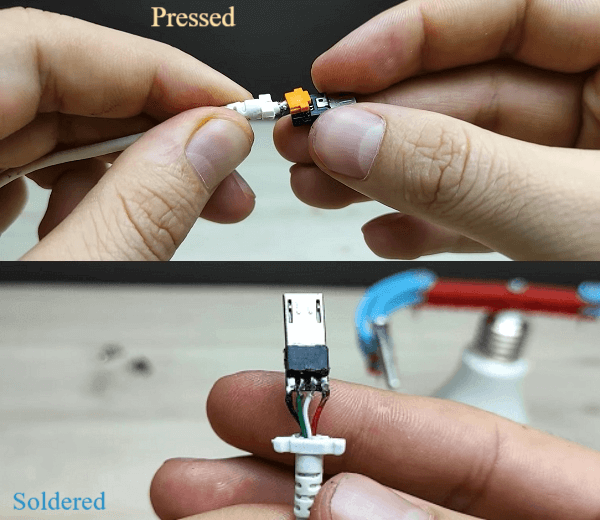
With a pair of pliers remove the metal piece of the connector that is holding the cable and the connector together. You should be left with the connector and the cable, which is either “pressed” or “soldered” to the connector.
5. Connecting the connector

If the cable is pressed use something with an edge to push the piece of plastic holding the wires in place. Keep the plastic you will need it.
If it is soldered you will need a soldering iron to remove the wires. Just heat the connection a bit until you can gently pull on the cables and they disconnect.
(From now on the main steps will be for pressed cables, the soldered ones will be marked as such.)
6. Order of the wires

Reuse the rubber part of the cable that is used for the stability of the cable near the connector. Set the cables in the order from the list, and put the piece of plastic from before.
Soldered: Add some soldering wire to the connector, don’t overdo it. From the end of the wires remove some of the rubber, the easiest way to do it is to burn some of it away with a lighter.
Wire order:
- GND: black
- vcc: red
- data+: Green or gray
- data-: white or yellow
7. Connecting the connector
Connect the plastic with the wires to the connector. Use pliers to press the plastic into the connector, just make sure it’s set good.
Soldered: Solder the wires in the right order. Don’t solder the wires together.
8. Finishing the cable
If you followed all the steps you can push the rubber part up to the connector and put back the rubber you removed from the connector. You can use electrical tape to hold it in place.
All of these steps work for both connectors or both sides of the cable.
How To Fix a Bent Charger Cord
- Tools and Materials: Electrical tape
If there are exposed cords on your Android charger cable you should still fix it even if your phone still charges. If you leave exposed cords or a worn-out table for too long, it can lead to damage down the road and create safety issues during use.
- Step One: Easily fix exposed internal cords or a worn-out cable by wrapping strips of electrical tape around these areas. This method will also prevent your cord from breaking when it bends.
How To Fix Bent Charger Prongs
- Tools and Materials: Pliers x 2
The prongs of your Android charger are the two metal pieces sticking out of the adapter that plugs into the outlet to charge your phone. If you’re facing bent or warped prongs on your adapter, they won’t be able to fit in the outlet correctly or create a solid electrical connection.
Luckily, fixing it is a simple process.
- Step One: Use one pair of pliers to hold the bottom of the prong near the plastic, and the other to bend the prongs back into their proper position at a 90°angle to the charger adapter and parallel to one another.
- Step Two: Be careful not to bend them too much or repeatedly, or you risk breaking them off entirely which could render the adapter useless.
How To Fix a Bent Charger Tip
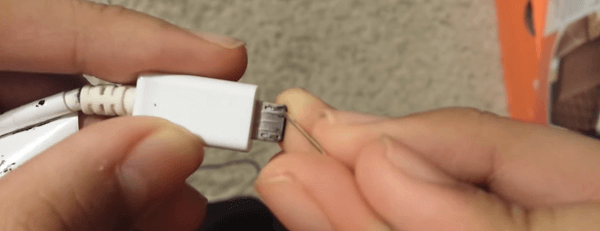
Tools and Materials:
- Needle
- Pliers
If the tip of your Android charger cord is bent or mangled in some way, you can make minor adjustments that will have it back to working condition. Or if it’s bent all the way you can use pliers.
- Bent inside: Use a needle to adjust the inner workings of the tip. Carefully push the bent parts back into place so they can make a proper electrical connection.
- Bent outside: Use the pliers to gently straighten the whole tip.
How to Fix Port Problems With Your Android Phone
Tools and Materials
Sometimes when your Android charger isn’t working, it means that there’s an issue with your phone instead of the charger itself.
- Step One: Check your phone’s charging port and see if it’s blocked with debris.
- Step Two: Clear it with a toothpick and an electronics cleaning brush to see if the charger becomes more effective.
- Step Three: You can also attempt the tried and true method of turning your phone off and back on again.
- Step Four: Another good step is making all necessary updates to your phone before charging it again.
Frequently Asked Questions
See the frequently asked questions below for other Android charger cord concerns you may have.
Why do chargers break so easily?
Chargers break so easily because they are handled frequently and made with delicate materials. They consist of thin copper wires that can easily be bent, broken, and maneuvered. This makes them more susceptible to breakage.
Many charger cords break from overuse when they are plugged and unplugged repeatedly, wrapped tightly for transport, or pulled on when removing the electrical device.
Additionally, extreme temperatures can create charger cord problems. For example, dry climates can cause the outer sheath to crack sooner, exposing wires, while humid climates can affect charging port connections, making them ineffective.
The average lifespan of a charger cord is one year, but with proper care, that can extend longer.
Is it safe to put duct tape on a broken charger?
No, duct tape is not safe to use on a broken charger. It is not flexible like electrical tape and is not designed to use on exposed wires that you would find on broken chargers.
Duct tape material does not provide electrical insulation and is not stable to use with an active current. In addition, duct tape is flammable when under heat, therefore posing a significant fire risk.
Are all Android chargers universal?
No, not all Android chargers will work with every device. It will depend on the charging port and the voltage when finding the correct cord for your electronics.
Generally, Android chargers will come in one of two styles: Micro-USB and Type C chargers. You can also find varieties of these styles that can charge a device sooner with a higher voltage.
Fixing a Broken Android Charger Cord
It can be a simple process to fix your broken Android charger cord by knowing what the problem is and using the proper tools and supplies. You do not need any previous electronics experience, and with a few easy steps, your cord can be functional once again.
Now that we’ve covered the many ways on how to fix a broken Android charger, you can approach this repair with ease. Take the time to thoroughly examine your charger to discover the exact damages. Invest in the right tools to complete the job efficiently.
Whether you need to fix cables, a worn cord, or anything in between, you’ll be able to save time and money by repairing it yourself.