Table of Contents
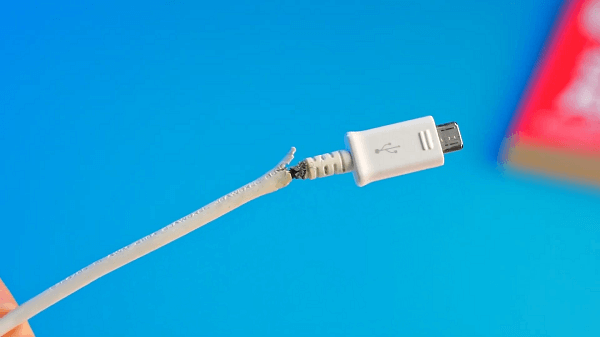
So you just broke your USB cable, and you need to figure out a quick repair. If you have the right tools lying around, you can repair the USB cable all by yourself.
Understanding USB Wires: The Basics
USB cables typically have four individual wires inside of their protective outer layer. Each wire has a specific function, such as:
- Power
- Ground
- Data
At each end of the wire, a connector or plug goes inside your device. Inside the plugs, each of the cables sits on a terminal matched to its function.
If you break the plug end, you can replace it with a new one without replacing the whole wire. If you accidentally cut the wire, you can splice the individual wires together to repair the break.
Let’s look at how to do each repair more closely. Before you get started, remember that using an undamaged USB cable from the original manufacturer is much safer than using a cheap version or one that has been repaired.
Replacing the Plug
This process isn’t complicated, but you need patience and these tools:
Tools & Supply’s
- wire cutters
- razor/utility knife
- lighter
- wire stripper
- pliers
- soldering iron
- soldering flux
- heat shrinks and/or electrical tape
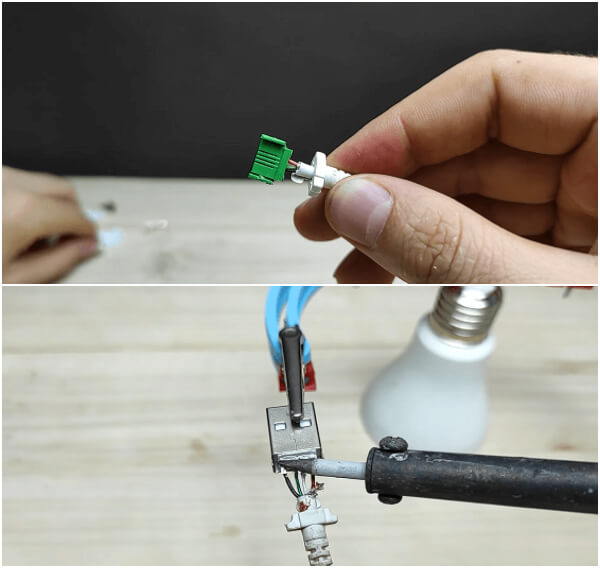
1. Open Things Up
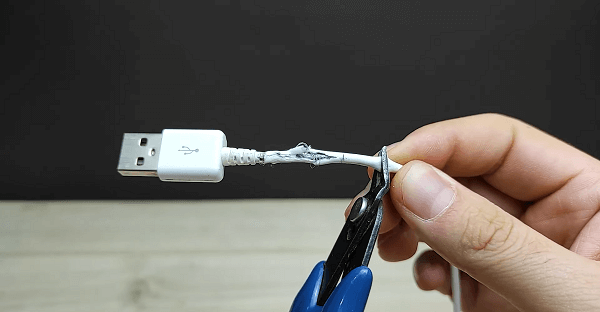
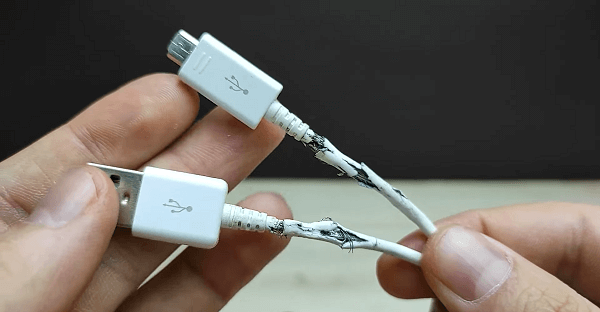
If your plug has broken, cut it off with a pair of wire cutters. You’ll end up with an outer sheath or cover with four wires inside.
To expose the internal wires, remove a bit of the cover by using a razor or a utility knife to cut through it. Make sure your cut is barely deep enough to make your incision and not so profound as to damage the wires inside.
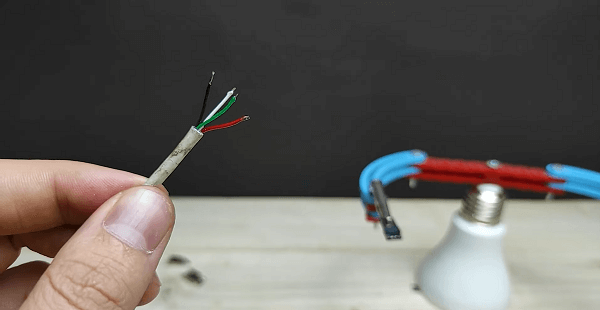
Now you should have exposed about an inch of four individual wires. Typically, they are:
- Black
- Red
- Green
- White
The colors may vary slightly, depending on the type of USB cable.
If you can’t easily separate them from each other by at least a finger’s width, peel back more of the outer sheath. Don’t go too far, but you need to have enough room to operate.
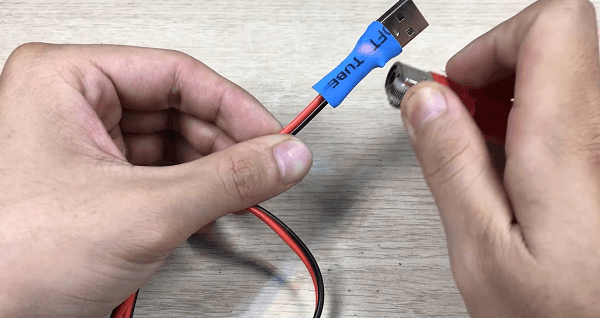
2. Strip the Colored Wires
Now, use a wire stripper to remove the colored outer covering from each wire. You only need a few millimeters of the copper core inside exposed.
If the strands of copper are messy, use a pair of pliers to straighten them out. This neatness ensures they won’t contact each other when attached to the connector and that they will provide solid connections.
3. Prepare to Connect
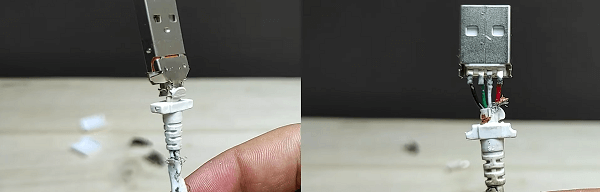
Luckily, most USB cables have a standard wiring layout where each color denotes a specific function. So, your new connector probably has a wiring guide or schematic that shows you where to put each of your wires.
Open up the connector, and compare the inside to your wiring diagram. Then match the wires with their terminals.
Typically, USB cables follow this color coding:
- Red – Voltage (power)
- Black – Ground
- Green – Data+
- White – Data-
Keep in mind that there are different types of USB cables. If you see five wires or different colors, you might have a different kind of wire.
4. Make Your Connections
Once you’re sure about where each wire needs to go on the connector, you can put them in place and secure them.
Some new USB connectors require you to solder the new wires in place. Other new connectors have a solderless design. Either way, put each wire in place and then secure it.
5. Protect Your Work
Now that everything is in place, you should snap the connector back together. Some kits recommend using a strip of electrical tape around the wires to support the connections, while others don’t require additional tape.
6. Test

After all your hard work, it’s time to plug your wire in and test it. If you followed all the steps carefully, you fixed your USB cable and saved some money. Well done!
How To Repair a Split In A USB Cable
If your USB cable has split in the wire and the plugs are undamaged, you can splice it back together. Here’s the best way to do so.
- 1. Expose More Wire – Use a razor or a utility knife to remove the outer sheath and expose the internal wires a bit from each end of your split cord.
- 2. Strip the Colored Wires – Now, using a wire stripper, remove the colored insulation from about half an inch of each wire from each side of your USB cable. On one side, make a little more room. Make sure the copper is neat and straight.
- 3. Prepare Your Connections – Now, pick one side of the damaged USB cable. Slide an appropriately sized heat-shrink wire connector onto each of the colored wires on the side where you left some extra room. Carefully match each of the four wires to its color-matched partner from the other side of the damaged cable. Make sure the cables overlap and twist them together slightly.
- 4. Secure Your Connections – Working one wire at a time, slide the wire connector over the connection, and apply heat to shrink it in place, securing your work. Repeat until all the wires are connected.
- 5. Test Your Work – Now, you’re ready to plug your cable back in and make sure it works as it should. If you made all your connections right, it will. Then, wrap everything in electrical tape for added support and protection. Voila!
Repairing a USB Cables
Now you know how to repair a USB cable, we also have a how to repair an HDMI cable. Don’t hesitate to give it a try. It’s pretty straightforward! However, it might be time to buy a new cable if you’re still having trouble after this guide.